
The General Data Protection Regulation Law, or GDPR, has been in the news and on the lips of online businesses across the globe. Simply put, GDPR is a new set of regulations in Europe that require websites to ask for their users explicit permission before storing any data about them on their website. This affects all types of websites; considering almost every website requires the user to store data about themselves with a cookie somewhere on the website. But how does this affect your WordPress website in regards to Google Fonts (which a lot of web creators love)?
Google fonts are very practical but can violate the GDPR laws in the EU as recent cases have shown. These fonts are loaded externally, and thus the users’s IP (which is personal data) is exposed to a third party, possibly without user consent. To stay GDPR compliant, in theory the website operator must prevent loading Google Fonts before a user has agreed to load them. But this would result in layout issues and a degraded user experience (e.g. after the fonts are loaded the layout would shift).
A better solution is to host the required fonts locally and thus avoid external requests. This doesn’t require much effort when using Elementor Pro and some online tools. Here’s how to do it:
1. Convert a google font
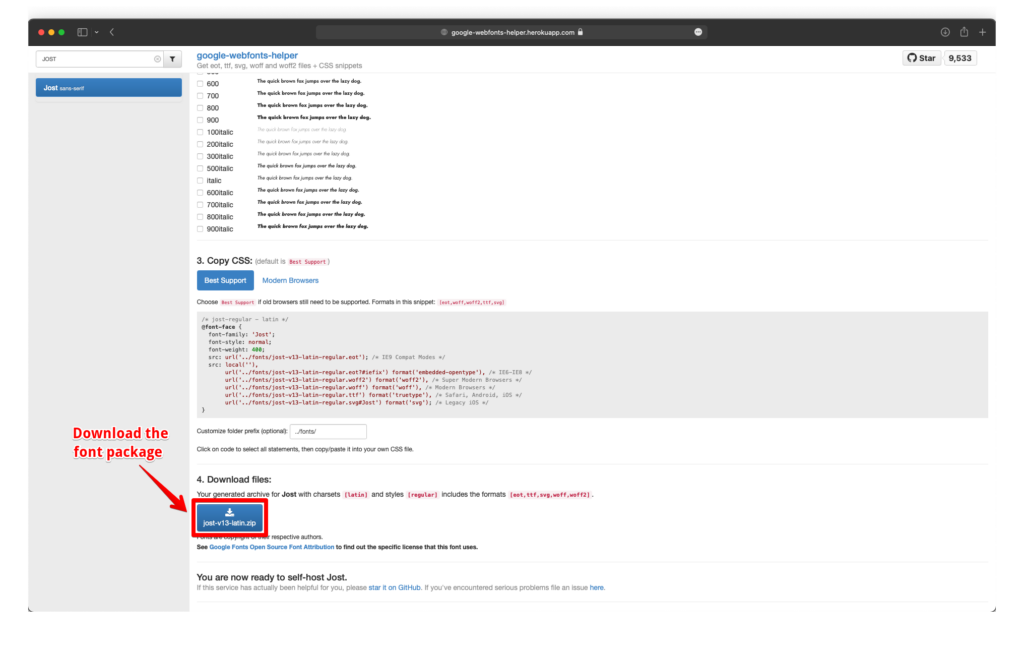
Using Google Fonts Helper makes this very simple – simply search for the font and specify the required styles. Download the font package (and ignore the CSS since you don’t need it for the next step).
2. Create custom font with Elementor and get GDPR compliant
Now upload the fonts to Elementor via Elementor / Custom Fonts / Add New. Assign the downloaded font files for each weight and style. Depending on the variations you’ll end up with many combinations but luckily this is a one-time setup. Eventually, it should look something like this:
If you need further assistance please check this help article: How to Add Custom Fonts Using Elementor.

3. Replace the external fonts with local fonts
To actually serve the custom fonts you must replace the fonts in your site’s content. If you used Global Fonts in Elementor this is done very quickly (and is also the recommended way to do it). If that is not the case: use the chance to go over your pages and replace your font styles 🙂
In the end you want to ensure that you didn’t miss anything. You can test it e.g. with Chromes’ inspector tool and evaluate from where fonts are requested and they should be from your site’s domain of course:

We care about privacy and thus we applied this technique on our website! The fonts used in our website are picked from Google Fonts and are being loaded from the server.